Bánh Mì –what is in a Bánh mì Sandwich?

bahn mi

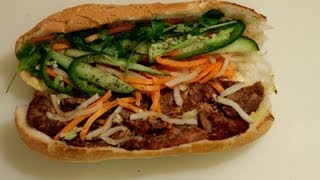
What is in a Banh Mi? Lets take one apart and see what we got.

Best Banh Mi, so far–thanks to eastsidegirl1977 for the great Seattle recommendation. I’ve been eating a lot of these sandwiches crammed with spicy, fresh ingredients–maybe too many sandwiches–but it’s too great a taste and value to pass up.

Bánh mì are a fusion of French and Vietnamese culture. Spicy peppers and daikon mix with cooling carrot and cucumber to create a a real treat for your tongue, and a little BBQ pork added makes it irresistible; wrap it up in a crunchy French baguette and it’s heaven.

Basic Banh Mi Ingredients:
Baguette
Sliced Pork
Pickled Daikon
Pickled Carrots
Cucumber
Cilantro
Hot Pepper
Mayonnaise
Black Pepper
Salt (if desired)

What is Bánh tét?
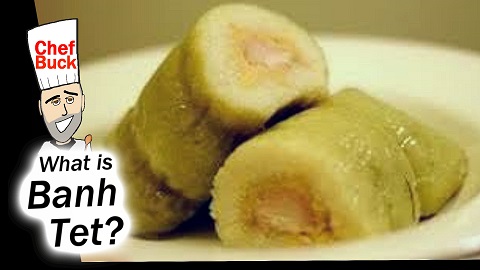
banh tet rice cake

Thanks for Watching our Bánh Mì Video

Click a button below and share the dishes with your friends. You can also follow Chef Buck on Youtube. We appreciate all the kind comments and support, and we’ll see you next time in the kitchen!

If you like what CG and I do, support us on Patreon, or throw us a tip in our Paypal Tip Jar. We’ll happily enjoy a coffee on the road – Thanks! We appreciate all the support, and we’ll see you next time in the kitchen!

We include affiliate links for products on our website. Making a purchase after clicking on our links and we may earn a commission which helps us produce more videos and drink more coffee :^) We participate in the Amazon Services LLC Associates Program, which is an affiliate advertising program. It provides a means for us to earn fees by linking to Amazon.com and affiliated sites, so we can make more videos.

If you’re new to home cooking, get a bunch of spices, pots and pans, and start experimenting with different recipes. It’s a healthy hobby that can save a lot of money in the long run. Check out current prices for Complete Kitchenware Sets on Amazon as well as Complete Starter Spice Kits. Or try a thrift store! I’ve found some of my favorite kitchen gear at second-hand stores.
Share and Enjoy !

Sushi Conveyor Belt –never leave your seat for fresh fish.

fast food sushi

Are conveyor belts better than waiters? We check out the sushi conveyor belt at Genki Sushi where sushi favorites glide right past the table; it’s a fun way to eat–and pretty affordable, too.

Kaiten-zushi is a sushi restaurant where plates move along a conveyor belt, winding through the restaurant and moving past every table and counter seat. Customers simply pick their selections from a steady stream of fresh sushi moving along the conveyor belt. The bill is based on the number and type of plates of the consumed sushi–often the plates are color coordinated by price. Some restaurants use creative conveyor belts that resemble “sushi boats” traveling small canals or miniature locomotive cars.

It’s a great place to eat on a budget because you can sample a variety of dishes without spending a lot of money–this is especially true if you’re eating out with friends. There is generally a wide price range based on the color of the plates, so choosing the right colors can get you filled up for the right price. The dishes circulating on the conveyor belt are both hot and cold, and not always sushi–some desserts and specialty drinks are thrown into the mix, too. Often the restaurant will offer the option to place special orders, but with such a varied choice of dishes winding it’s way right past your seat, it will be impossible to not grab something off of the sushi conveyor belt–which is the whole point, I guess.

Click the pic below to check out our trip to Spudnuts, Home of the Potato Donut.

spudnuts

Share and Enjoy !


Cha Lua — Let’s Try Vietnamese Ham

cha lua vietnamese ham

Cha Lua, or Vietnamese ham, is a staple of the Vietnamese diet and often found on the table during Tét–the celebration of the New Year.

During a recent trip down to Little Saigon (on a bánh mi run), we randomly picked up a cha lua and brought it home to give it a try. It was pretty bland right out of the banana leaves, with a rubbery consistency–but these characteristics make it a pretty versatile ingredient in many dishes–much the same as tofu, but a meat version. I ended up slicing and marinating the ham in chili and soy sauce with curry and garlic powder and frying up the slices to make an awesome bánh mi burger–which was delicious; I will definitely be making again in the near future.

Take a look at the exceptionally delicious Bánh Mì Hamburger made with cha lua.

Take a look at a traditional Bánh Mì Sandwich.
bahn mi

Share and Enjoy !


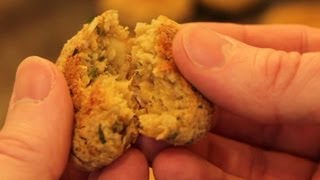
Baked Falafel Recipe – healthy and delicious

baked falafel

This baked falafel recipe is a tasty and nutritious way to enjoy chickpeas (garbanzo beans).

Falafel is traditionally fried, but a baked falafel can make a tasty, healthy, and easy alternative to the tried and true oil-splatter-fest.

Baked Falafel Recipe Ingredients:
1 15oz can CHICKPEAS
1/4 cup CILANTRO
1/4 cup PARSLEY
1/4 cup ONION
2-3 cloves GARLIC
2 Tbsp OLIVE OIL
CAYENNE PEPPER, to taste
1 tsp CORIANDER
1 tsp CUMIN
1/4 tsp BAKING POWDER
1 Tbsp BREAD CRUMBS (or flour)
1 Tbsp LEMON JUICE
SALT, to taste
— Optional garnishes —
HUMMUS, YOGURT, VEGGIES, PITA SLICES

Drain and rinse 15oz can of chickpeas (garbanzo beans). Combine in a food processor with all ingredients (except 1 Tbsp olive oil and bread crumbs). Mix roughly–pulse–DO NOT puree into a smooth consistency. Place mixture into a bowl and combine with dried bread crumbs (or substitute flour). Form into discs–I like to get 10 out of this recipe because they cook up well and fit nicely into a pita pocket–but make them as big as you like, and adjust the cooking time accordingly.
(Refrigerate 1-2 hours before cooking if you have the time–they’ll bake better, maybe, but it’s not the end of the world if you don’t. I actually prefer putting them in the fridge for a bit, but sometimes I don’t, and the difference is negligible.)
Place on a flat baking sheet and lightly drizzle or brush with olive oil.
Bake at 400 degrees F for 20 minutes, then turn falafel and bake for 10 more minutes to brown each side (a total cooking time of 30 minutes).
Serve with hummus, yogurt, veggies, and pita slices–or stuff inside a pita to make a delicious falafel sandwich.
And that’s it, man. Give this baked falafel recipe a try and let me know what you think and bon appetit!

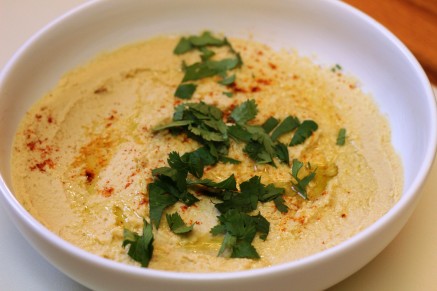
And if you wanna make your own hummus try this Easy Hummus Recipe.
hummus

Share and Enjoy !


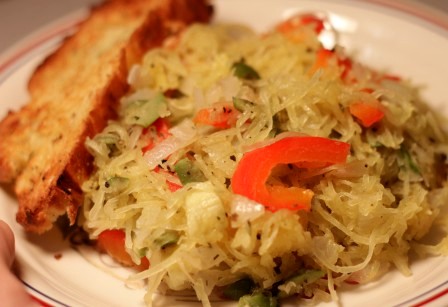
Spicy Spanish Spaghetti Squash Recipe w/ Sausage

spaghetti squash spanish

Spaghetti squash tastes great with a little Spanish chorizo thrown into the mix.

When buying, choose a firm spaghetti squash that seems heavy for its size. Avoid squash with overly glossy or with greenish rinds–this may indicate the squash is not quite ripe enough. The stem of a spaghetti squash should be dry. Moisture around the stem may mean the squash is not fresh.

Ingredients:
1 SPAGHETTI SQUASH
4-5oz Spanish style CHORIZO (diced)
1 lg ONION (chopped)
4-5 cloves GARLIC (finely chopped)
1/2 cup PARMESAN or ASIAGO CHEESE (shredded)
1/2 cup CILANTRO (chopped)
2 Tbsp OLIVE OIL
SALT and PEPPER, to taste

Preheat oven to 350 degrees F.
Slice 1 spaghetti squash lengthwise into halves. Remove seeds and place cut side down in a baking pan. Pour a small amout of water in the pan to keep the squash from sticking. Place in the oven and bake for 45 minutes. The squash is ready when a fork will slide easily into the flesh.
In a skillet, heat oil on medium high heat. Add onions and saute a few minutes (add red pepper flakes for heat, if desired). Add garlic and chorizo and continue sauteing. Add salt and pepper to taste. You don’t need a lot of seasoning for this dish–the chorizo will add plenty of flavor. Take a fork and scrape the squash away fromm its skin and into the skillet; the squash will separate easily in spaghetti-like strands…which is why it’s called what it’s called. The squash is already cooked, so this is more about mixing the ingredients than cooking them. Add cilantro and cheese, mix well, and remove the skillet from the heat. It’s a delicious dish, and hearty enough to make a terric main course. Serve with a salad and bread and you’ll have a more than enough.
Enjoy!

And try this delicious vegetarian Mediterranean-Style Spaghetti Squash Recipe

mediterrean spaghetti squash

Share and Enjoy !


Maki Sushi – Step-by-Step How to Make Sushi

sushi

Maki sushi is my favorite sushi (makizushi), or sushi wrapped in dried seaweed (nori). Check out the video for step-by-step instructions on how to make sushi quick and easy.

Maki sushi is one of the healthiest and most entertaining foods you can put on the table…and pretty easy to prepare. You will need a SUSHI ROLLER to easily make this recipe. They are available at many supermarkets, most health food stores and every Asian market. You can get one for around $2 to $4.

Maki Sushi Ingredients:
6 to 7 NORI (dried seaweed sheets)
2 cups RICE (do not use long grain rice! Japanese sushi rice can be used, but I prefer short-grain brown rice.)
1/2 cup VINEGAR (apple cider or rice)
SALT (to taste, I use very little)
Assortment of SLICED VEGETABLES, FISH, etc
Feel free to experiment with your choices. I generally use a mix of the following: AVOCADO, CUCUMBER, CARROT, GREEN ONIONS, RED PEPPERS, SALMON (I buy 3oz pre-packaged smoked salmon for convenience, since I use so little). I’ve also used SHRIMP, CRAB, CREAM CHEESE and ASPARAGUS (lightly steamed). Mix and match and find combos you enjoy. I find that I almost always use avocado.
Desired condiments e.g. SOY SAUCE, WASABI, PICKED GINGER SLICES
Optional: I like to sprinkle TOASTED SESAME SEEDS over my finished sushi—it adds a great taste and looks nice, too.

Prepare rice according to directions. Remove from stove and add vinegar. Gently mix and set aside to cool. Slice desired ingredients for filling. For a full dinner for two, I generally use 6-7 nori. Place nori shiny side down on your sushi roller. When rice is cool, spread desired amount over nori. I like heaps of rice in my maki sushi, approx. ¾ to1 cup. Spread so that the rice covers the nori leaving ¼ inch on the two sides and on the end closest to you. Leave 1 inch open on the far end of the seaweed sheet. Pull the nori flush with the back end of the roller. Lay the sliced fillings across the rice and, holding the ingredients in check with your fingers, use the roller to roll the seaweed over the ingredients and then press gently along the top and sides. The seaweed should form a nice wrap around the ingredients. Pull the seaweed roll to the back of the roller and roll forward once more until the nori is shaped entirely around the fillings. Use a sharp knife to slice into sushi, and wipe the knife frequently for a cleaner cut. I usually get 6-7 pieces per roll.
After I plate my sushi, I sprinkle lightly with toasted sesame seeds (optional) and serve with wasabi, soy sauce, plum sauce, and pickled ginger slices.
It’s an amazingly easy dish to prepare and a great way to impress a date or get yourself out of the doghouse (if you’re at that stage in your relationship). It kicks ass at parties and your friends will think you are more hip than you probably are –but only if you USE CHOPSTICKS!!!

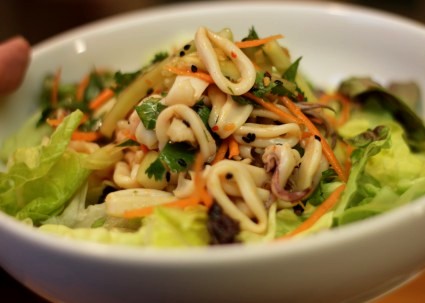
For a great maki sushi recipe side, try a Calamari Salad Recipe.
calamari salad squid

Share and Enjoy !


Follow Me!