Lemon Meringue Pie Recipe … Best Pie Ever

lemon meringue pie

If you love fresh-baked homemade pie, you’ll want to try Mama Redbuck’s best lemon meringue pie recipe. The meringue recipe for this lemon pie is truly impressive and piles high and holds its shape and makes a great topping for any kind of pie you bake. My mom uses this perfect meringue recipe for chocolate cream pie as well, and I love it. This lemon pie is full of fresh lemon goodness, so give this dessert recipe a try, and you’ll be glad you did.

Lemon Meringue Pie Recipe

pie filling ingredients:
9″ DEEP DISH PIE CRUST
1 cup SUGAR
½ cup CORN STARCH …check cornstarch price on Amazon
¼ tsp SALT
2¼ cup WATER
1 Tbsp LEMON ZEST …current prices online for Kitchen Zesters
4 EGG YOLKS
3 Tbsp BUTTER
½ cup LEMON JUICE

meringue ingredients:
2 Tbsp SUGAR
1 Tbsp CORNSTARCH
½ cup WATER
4 EGG WHITES
1 tsp VANILLA
pinch of SALT
then another 4 Tbsp SUGAR
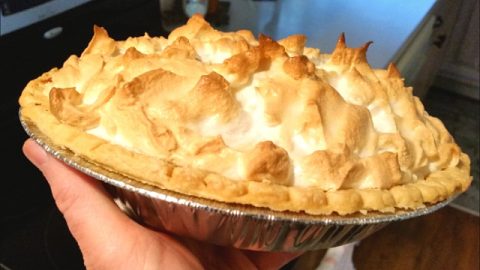
lemon meringue pie
Try Mama Redbuck’s best lemon meringue pie recipe ever!

How To Make Lemon Meringue Pie

Make your own pie crust from scratch, or to make the recipe super easy, just bake up a pre-made frozen pie crust.
Firstly, bake the crust and have it cooled and ready before beginning to make the pie filling.
Then break 4 eggs and separate the yolks from the whites in two separate bowls.
Zest two lemons, and then squeeze the juice to fill ½ cup.

To Make The Lemon Pie Filling:

In a saucepan, add the sugar, cornstarch, salt, and zest of two large lemons.
On medium heat, stir water into the saucepan and continue stirring the pan 15-20 minutes, or until the mixture thickens and begins to bubble.
Slowly spoon 5-6 Tbsp of the heated, thickened mixture in with the eggs yolks, stirring constantly so as not to cook the eggs.
Then stir the egg yolk mixture into the saucepan with the rest of the heated filling.
Stir in the lemon juice and butter and continue stirring until the butter is melted and the mixture is smooth.
Pour the filling into the pre-baked pie shell and set aside to cool.

To Make The Meringue:

In a small saucepan add 1 Tbsp of cornstarch, 2 Tbsp sugar, and ½ cup water.
Mix the three ingredients well and on the stovetop heat over medium heat, stirring until the mixture thickens and clears slightly.
Set saucepan aside to cool.
In a mixing bowl, beat the egg whites until frothy.  My mom uses a plain old hand held electric mixer.  You can check here for current hand mixer prices on Amazon if you need one for your kitchen.
Add in vanilla and a pinch of salt and beat again to mix.
Gradually beat in 4 Tbsp of sugar, 1 Tbsp at a time.
Then beat in the cooled cornstarch mixture.
Continue beating until stiff peaks form.

To Finish The Pie:

Take a spatula and spread the meringue evenly over the pie filling.
Lightly chop the top of the meringue to form peaks on top of the pie.
Slide the pie into an oven preheated to 400 degrees Fahrenheit and bake meringue for 10-12 minutes,
or until the top of the top of the meringue sets and shows a nice color.
Remove the pie from the oven and allow to cool completely before slicing.
When cooled, store pie in the refrigerator beneath a pie dome, do not wrap meringue in plastic wrap or foil.

lemon meringue pie
This meringue pie topping is tasty on all kinds of pies.

And that’s it! Give Mama Redbuck’s Lemon Meringue Pie Recipe a try and let us know what you think.

Or try Mama Redbuck’s step-by-step CHOCOLATE PIE RECIPE.
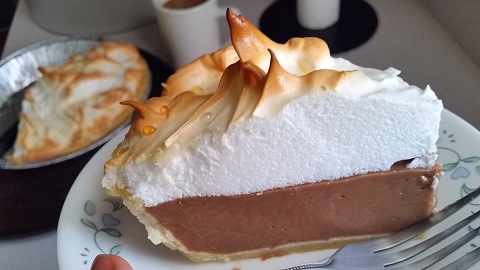
chocolate pie recipe


And for another simple dessert recipe idea, try this easy Chocolate Cake Recipe.

lemon meringue pie
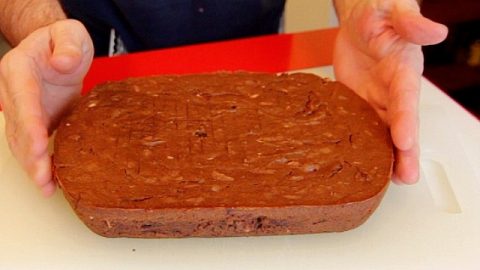
Try this easy chocolate cake recipe…made with beans…wha!!!?

We appreciate you watching  our videos!

I hope you enjoy this lemon meringue pies recipe. Sign up for our mailing list so you’ll never miss a new recipe. Also click a button below and share the dishes with your friends. You can also follow Chef Buck on Youtube. We appreciate all the kind comments and support, and we’ll see you next time in the kitchen!

If you like what CG and I do, support us on Patreon, or throw us a tip in our Paypal Tip Jar. We’ll happily enjoy a coffee on the road – Thanks! We appreciate all the support, and we’ll see you next time in the kitchen!

We include affiliate links for products on our website. Making a purchase after clicking on our links and we may earn a commission which helps us produce more videos and drink more coffee :^) We participate in the Amazon Services LLC Associates Program, which is an affiliate advertising program. It provides a means for us to earn fees by linking to Amazon.com and affiliated sites, so we can make more videos.

Share and Enjoy !

Gluten Free Muffins with Apple Cinnamon

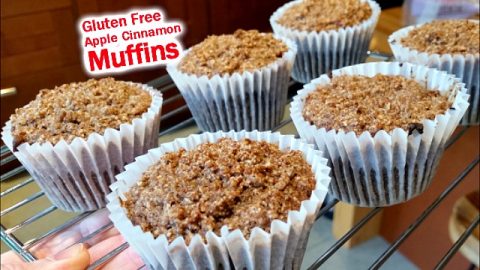
gluten free muffins

Check out these moist and delicious gluten free muffins made with almond flour. CG has been baking muffins up the wazzoo lately, and apple-cinnamon almond flour muffins are some of my favorites, so give them a try. Don’t be put off by terms like gluten free and grain free, just focus on delicious. Also feel free to experiment with recipe substitutions as well, like maple syrup instead of coconut sugar, or ginger instead of apples, or using banana instead of apple sauce.  Muffins are great treats, and while gluten free options are generally underwhelming, this muffin recipe is a winner.

Ingredients for Gluten Free Muffins

Crumble Topping:
(this recipe makes enough for 2-3 batches of muffins)
5 Tbsp ALMOND FLOUR
3 Tbsp COCONUT SUGAR
1½ tsp CINNAMON
pinch of SALT
2 Tbsp refined COCONUT OIL

Dry Ingredients:
2 cups ALMOND FLOUR
1 heaping Tbsp CINNAMON
1 tsp BAKING SODA
¼ tsp SALT

‘Wet’ Ingredients:
3 regular EGGS
2 tsp VANILLA
4 Tbsp COCONUT SUGAR or use 1/3 cup maple syrup
113g (3-4 oz) unsweetened APPLESAUCE
2 Tbsp refined melted COCONUT OIL

1 medium APPLE, diced

(this recipe makes 6-8 muffins)

*Refined coconut oil does NOT have a coconut flavor; virgin coconut oil HAS a distinct coconut flavor

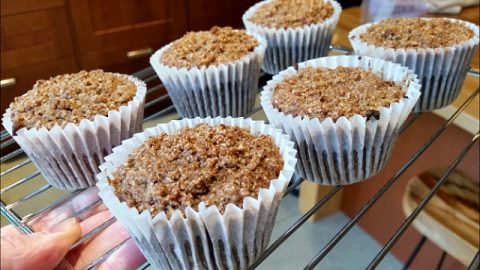
gluten free muffins
Gluten free apple-cinnamon muffins that are delicious? Oh, yeah.

How to Make Gluten Free Muffins with Apple Cinnamon

  • Prepare baking tins and have cooling rack ready.
  • Preheat oven to 375.
  • Combine crumble topping ingredients together. Coconut oil should be in a solid state in order to cut into the mixture like butter, then store the crumble in fridge while mixing together the rest of the batter.
  • Mix the dry ingredients together and set aside.
  • In a bowl, whisk eggs together. Add vanilla, coconut sugar, applesauce, and melted coconut oil, and mix well.
  • Then add dry ingredients to wet, combining just until all ingredients are wet, no need to over mix. Add apples and mix gently.
  • Divide batter equally between 6-8 muffin cups.
  • Top each muffin batter cup with crumble topping, as much as you like.
  • Bake in preheated oven at 375 degrees for 10 minutes. Turn muffins around; bake for another 10 minutes.
  • Test muffins with a toothpick or knife blade. The muffins are ready if no batter sticks on the toothpick or knife. If muffins need more cooking time, return to the oven and then test every 4 minutes, because there’s no reason to get this far and then burn your muffins!
  • When finished baking, cool muffins on rack for about 5 minutes, this will keep them from sticking to the muffin cup papers.

Muffin Time!

Now all you need is a hot cup of coffee or a cold glass of milk and you’ll be on your way to a perfect day! Give this gluten free muffins recipe a try and then let us know what you think. And for another dessert recipe, give this Gluten Free Chocolate Cake Recipe made from beans. wha!?

chocolate cake recipe
A flourless, gluten-free chocolate cake

Thanks for watching our recipe videos and then trying some out. If you like what you see, click a button or two below and share this gluten free muffins recipe with friends and family. I appreciate it!
–Chef Buck

Share and Enjoy !

Pad Thai Recipe with Spaghetti Squash Noodles

pad thai recipe

Try a tasty Pad Thai recipe with a spaghetti squash twist. Spaghetti squash is a lowfat low carb ingredient with a terrific texture and a mild flavor that allows it to work well in a variety of recipes, including this easy Pad Thai Recipe. A few simple ingredients are all you need to cook this healthy faux noodle vegetarian recipe.

What You Need to Make Pad Thai Recipe w/ Spaghetti Squash

SPAGHETTI SQUASH
4-6 cloves GARLIC finely chopped
2-3 GREEN ONIONS chopped, bottoms separated from tops
1 RED BELL PEPPER chopped
2 Tbsp OLIVE OIL
1 Tbsp SESAME OIL
1-2 Tbsp RICE VINEGAR
1- 2 Tbsp SOY SAUCE
1-2 Tbsp PEANUT BUTTER
FISH SAUCE (optional) 1 or 2 EGGS
1 tsp CHILI PEPPER
SALT and PEPPER to taste

Garnishes:
chopped PEANUTS
chopped CILANTRO
BEAN SPROUTS

The measurements above are just loose suggestions, and really need to be adjusted to your own tastes. The size of the spaghetti squash and how much squash noodles you dig out will determine how much of the other ingredients you need; they are simple and fresh ingredients, so there really is no wrong way to make this dish.

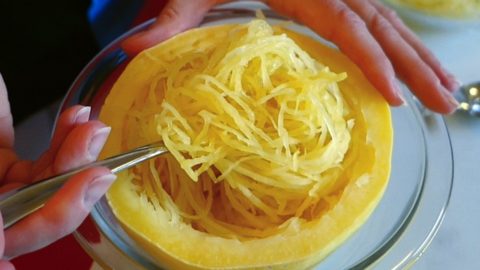
best spaghetti squash
When cooked spaghetti squash pulls apart into “noodley strings”

How to Make Spaghetti Squash Make Pad Thai

  • When buying a spaghetti squash, choose one that seems heavy for its size.
  • Carefully slice the squash into halves. Cut the squash across instead of lengthwise; this will make for longer “noodles”.
  • Place cut sides down in shallow water in a roasting pan.
  • Bake for about 30-45 minutes at 350 degrees Fahrenheit. You can check on the squash after 30 minutes; the cooking time will vary according to the size of the squash. It’s important not to overcook the squash, slightly crunchy strands of squash add great texture to a dish, and overcooking the squash will make the ingredient mushy.
  • Remove squash from the oven and carefully turn halves over to check for doneness –the water will be hot and steam will be trapped under the squash, so be cautious.
  • Allow squash to sit 5-10 minutes to cool slightly for easier handling.
  • Insert a fork and twist out strands of “spaghetti”. Once the fork has done its job, use a spoon to scrape out the remaining squash; it’s edible all the way to the rind, so don’t waste any!

On the stove top…

  • Heat a skillet on medium heat and add sesame and olive oil. You can check here for current pricing for a non-stick skillet on Amazon.
  • Add chopped green onion bottoms, chopped garlic, and chopped bell pepper and saute cook 1-2 minutes. If you like a bit of heat with your dish, add some red pepper flakes or fresh chopped hot peppers.
  • Add in salt and chili pepper and continue sauteing.
  • Stir in rice vinegar, soy sauce, and peanut butter. Add fish sauce if you’re a hardcore pad Thai aficionado. Add a bit of water to thin the sauce, if desired.
  • Cook for 1 -2 minutes. Then, add in the spaghetti squash and mix well with the sauce.
  • Make a well in the center of the squash and add in the whisked eggs. Once the eggs set, give them a stir and scramble, then mix scrambled eggs in with the rest of the dish and get it off the heat.
  • Top with fresh chopped cilantro and chopped peanuts and serve.
  • Add fresh bean sprouts, too, if you be cray.
pad thai recipe
Pad Thai with spaghetti squash noodles

And that’s it.
This recipe makes a nice twist on a traditional pad Thai recipe.
Give this spaghetti squash recipe a try and let me know what you think, and bon appetit!

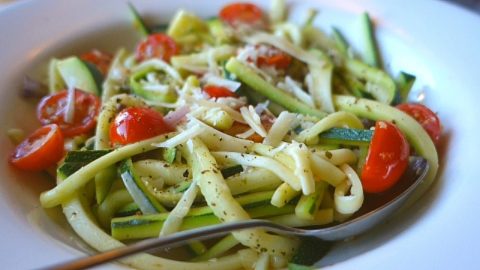
And for another healthy veggie noodle dish, try this handmade Zucchini Zoodles Recipe.

zoodles recipe
Handmade zoodles are easy to make and a nice change from a heavy pasta dish.

Thanks for checking out our spaghetti squash pad Thai recipe, and all of our recipes. Be sure and sign up for our mailing list and never miss a new Chef Buck cooking video, and also click a button below and share the dishes with your friends. We appreciate the kind comments and support, and we’ll see you next time in the kitchen!
–Chef Buck

Thanks for watching our recipe videos!

We include affiliate links for products on our website, so if you make a purchase after clicking on our links, we may earn a commission which helps us produce more videos and drink more coffee :^) We participate in the Amazon Services LLC Associates Program, which is an affiliate advertising program providing a means for us to earn fees by linking to Amazon.com and affiliated sites, so we can make more videos.
Share and Enjoy !

Hot Wings Recipe – Crispy Baked Chicken

hot wings recipe

Make a spicy hot wings recipe at home. You can bake crispy wings for a healthier version of your favorite wings recipe, and a Buffalo sauce is super easy to prepare. I usually buy the whole wings and cut them up at home, but you can buy bags of chicken wings already cut up into drumettes and wingettes.

What You Need to Make This Hot Wings Recipe

3 lbs CHICKEN WINGS
2 Tbsp BAKING POWDER
1 tsp SALT
½ tsp ONION POWDER
1 tsp GARLIC POWDER
1 tsp PAPRIKA
¼ tsp BLACK PEPPER
…but really, use whatever spices you like

Ingredients For Buffalo Hot Wings Recipe Sauce

¼ cup BUTTER
¼ – ½ cup HOT SAUCE
1 tsp WORCESTERSHIRE
1-3 Tbsp HONEY

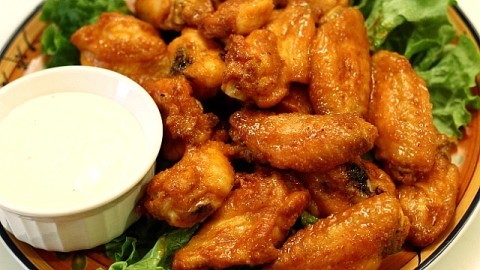
hot wings recipe
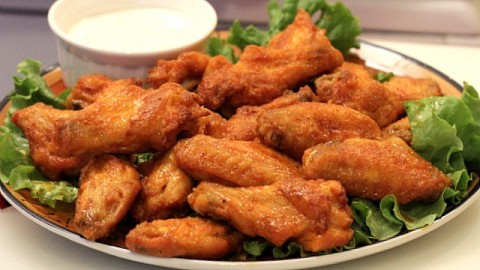
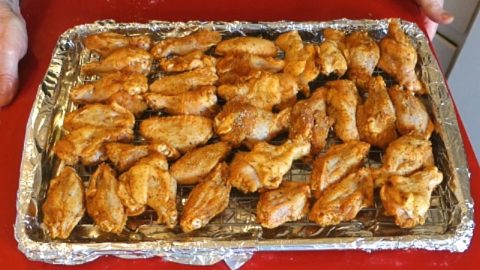
You can bake crispy chicken wings for a healthier version of your favorite hot wings recipe

How to Make Crispy Chicken Wings In The Oven

Preparing and Baking the Wings:

I generally remove the skin from chicken, but not when I’m having wings; that crisp cooked skin is what makes wings so tasty. Buy your wings already cut up, or cut the up yourself at home. They’re not difficult to process at home, just cut easily between the joints, and be sure and save the wing tips to use for a chicken broth.

  • Pat chicken pieces dry with a paper towel and set aside
  • Combine the baking powder and seasonings in a bowl and mix together well
  • Toss the wingettes and drumettes with the dry coating
    Arrange the chicken pieces on a wire rack over a baking pan and place in oven preheated to 425 degrees F. Here’s a good option if you want to price an oven-safe roasting rack on Amazon.
  • Cook wings for 50-60 minutes, turning every 20 minutes until crispy and done.
While the Wings Bake, Make the Sauce:

A classic Buffalo chicken wing sauce is easy to prepare.

  • In a sauce pot, melt butter
  • Add an equal amount of hot sauce to the pot, or more if you like your wings spicier
  • Throw in a splash of Worcestershire sauce
  • And for sweeter wings, add honey to taste
  • Mix well and heat through
hot wings recipe
A classic Buffalo chicken wing sauce is easy to prepare.
Sauce the Wings, Or Don’t:

I like my spicy wings right out of the oven, just the wings and crispy skin. I like them tossed in Buffalo sauce, too, so I usually sauce half and leave half un-sauced, but follow your own heart.

To sauce the wings, simply combine the wings hot out of the oven and the sauce hot off of the stove into a bowl and toss. And a creamy blue cheese or ranch dressing makes a nice accompaniment.

And that’s it!

Give this hot wings recipe a try let me know what you think, and bon appétit!

And for another fun party type food, check out this recipe for a giant platter of Nachos Supreme.

best nachos recipe
This is a fantastic Nachos Supreme dish, and a giant pizza pan makes a great dish for cooking and serving.

Thanks For Checking out our Recipes

We hope you love this hot wings recipe! Sign up for our mailing list so you’ll never miss a new recipe. Also click a button below and share the dishes with your friends. You can also follow Chef Buck on Youtube. We appreciate all the kind comments and support, and we’ll see you next time in the kitchen!

If you like what CG and I do, support us on Patreon, or throw us a tip in our Paypal Tip Jar. We’ll happily enjoy a coffee on the road – Thanks! We appreciate all the support, and we’ll see you next time in the kitchen!

We include affiliate links for products on our website. Making a purchase after clicking on our links and we may earn a commission which helps us produce more videos and drink more coffee :^) We participate in the Amazon Services LLC Associates Program, which is an affiliate advertising program. It provides a means for us to earn fees by linking to Amazon.com and affiliated sites, so we can make more videos.
Share and Enjoy !

Best Cauliflower Pizza Crust Recipe That Won’t Fall Apart

cauliflower pizza crust

You can make the best cauliflower pizza crust recipe that will not fall apart after baking. Slice it, hold it, eat it–it keeps its shape–and it actually tastes like pizza! This cauliflower crust pizza is gluten free, healthier than bread dough, and definitely worth trying.  And this recipe freezes well too so why not make 2 crusts?

All You Need To Make a Cauliflower Crust Pizza

2 cups of grated CAULIFLOWER
1 cup of freshly grated PARMESAN CHEESE
1 EGG beaten
PARCHMENT PAPER to line your baking sheet
PIZZA SAUCE, your choice   [see below for an easy, delicious tomato-based pizza sauce recipe]
PIZZA TOPPINGS, your choice

gluten free pizza crust
The best and easiest cauliflower crust pizza recipe. This cauliflower crust is delicious, holds its shape, and will not fall apart.

How To Cook A Cauliflower Crust Pizza Recipe

Cut And Dry Out The Fresh Cauliflower:

  • Grate fresh cauliflower florets into granules resembling “poprocks”
  • Heat the grated cauliflower in a skillet.  Don’t add oil or water–use medium heat, not too hot. Stir until the cauliflower has dried out somewhat. It won’t dry completely, but the dryer, the better. Heat at least 10 minutes, just enough to evaporate the moisture, not enough to color or cook down.
  • Remove skillet from burner and set aside to allow cauliflower to slightly cool.

Prepare and Cook the Naked Crust:

  • In a bowl, beat 1 egg.
  • Add grated Parmesan cheese to the egg. You can substitute, asiago or romano cheeses, just be sure you use a hard cheese for best results.
  • Add the cauliflower to the bowl and mix well with the egg and cheese and form into a ball.
  • Spread parchment paper onto a baking sheet. DEFINITELY USE PARCHMENT PAPER, otherwise your crust may tear when you try to pick it up. If you’re out of paper, here’s some current parchment paper prices on amazon.
  • Place the balled cauliflower and cheese onto the parchment paper and spread out into a pizza shape about ¼ inch thick. The crust will be about 10″ across.
  • Do not make the edges of the crust too thin; keep the size of the crust uniform for even cooking. The cauliflower will darken quite rapidly around the edges if too thin.
  • Place crust into an oven preheated to 400 degrees Fahrenheit and cook approx. 15-20 minutes until the crust has colored and firmed up.

Add Your Favorite Pizza Toppings and Finish Cooking:

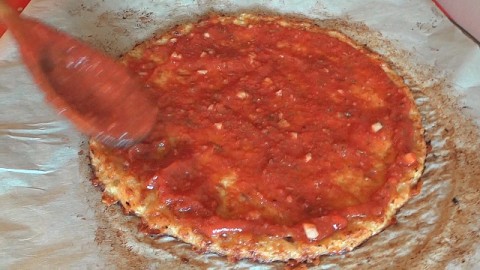
  • Remove cauliflower pizza crust from the oven and top with your favorite pizza sauce. Use a marinara sauce, pesto, white sauce, or whatever. Top with your favorite pizza toppings.
  • Return pizza to the oven and continue to cook at 400 F for about 10 minutes until the toppings are done, watch the edges of the cauliflower crust; the edges will darken too much if overcooked.
  • Remove the pizza from the oven and set on a cooling rack –or don’t– this step isn’t make or break.

And that’s it!  Eat and enjoy. Check here for current prices for a pizza pan on Amazon.

A cauliflower pizza crust will not rise since there is no yeast involved, and since the crust is entirely cauliflower, cheese, and egg, it will not achieve the same crispness as a thin dough pizza. But the pizza will stay together just fine, and will taste very much like a pizza.

cauliflower pizza crust
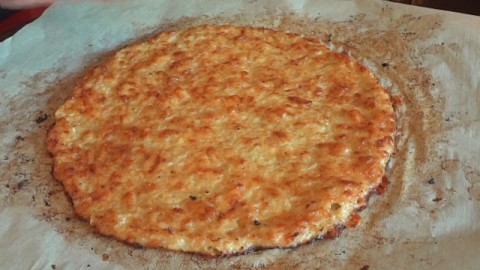
Cauliflower pizza crust after cooking about 20 mins. in a 400 F oven. Crust should be cooked firm with a nice, golden color.

Tips For Making A Cauliflower Pizza Crust That Will Not Fall Apart

  • Use fresh cauliflower, and only use the florets.
  • Don’t allow overly large pieces of cauliflower into the “dough” — keep the vegetable pieces reasonably uniform.
  • The dryer the cauliflower pieces the better, but don’t be obsessed!
  • Use only a hard cheese like Parmesan or Romano in the crust mixture, this helps make the crust stable.
  • Don’t make the crust too thick, around ¼” is ideal.
  • Make the crust a uniform size all the way to the edges so that it will cook evenly.
  • Cook the cauliflower crust on parchment paper! otherwise the crust will stick and break apart when you try to remove it from the pan.
  • Spread your pizza sauce almost to the outer edges of the crust; your pie will look better. The cauliflower pizza crust is a healthier choice, but it is not the prettiest pizza crust.
best cauliflower pizza crust
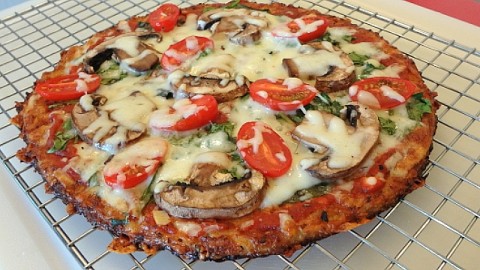
This cauliflower crust is healthier than a bread dough, with more nutrition and less empty calories.

Is A Cauliflower Pizza Crust Healthy ? …well

  • It provides more nutrition.
  • It adds less empty calories.
  • It’s gluten-free.
  • And it works. It’s a great alternative to a bready pizza crust that will satisfy your pizza needs.
pizza sauce recipe
Any pizza sauce will work with a cauliflower crust pizza, so use your favorite, but homemade is always best!

How to Make an easy Homemade Pizza Sauce

A good pizza needs a good sauce. It’s easy to make a simple pizza sauce at home that will suit your tastes exactly.

The key to a great homemade pizza sauce is making it at least a day in advance. Keep a jar of sauce in your fridge. You can use it on pizzas, but also on sandwiches, as a dip, or part of a marinara sauce for any Italian inspired dish.

You’ll need:
1 15oz can of TOMATO SAUCE
dried THYME dried OREGANO
dried BASIL
GARLIC POWDER or fresh chopped GARLIC
SALT and PEPPER
and for a little kick, add a little fresh or dried HOT PEPPER

Add the seasonings to taste. If you’re just getting started cooking at home, here are current prices for Spice Starter Sets on Amazon.

Are There Other Ways To Use A Cauliflower Pizza Crust?

For a tasty twist on this pizza crust variation, try using it as a Cauliflower Crust Burrito. Seriously, a burrito has tons of flavor, so it’s a great way to use this kind of recipe.

cauliflower pizza crust recipe
This is a nice variation on a burrito recipe and a great way to use a cauliflower crust.

Thanks For Checking out our Recipes

We hope you love this cauliflower pizza crust recipe! Sign up for our mailing list so you’ll never miss a new recipe. Also click a button below and share the dishes with your friends. You can also follow Chef Buck on Youtube. We appreciate all the kind comments and support, and we’ll see you next time in the kitchen!

If you like what CG and I do, support us on Patreon, or throw us a tip in our Paypal Tip Jar. We’ll happily enjoy a coffee on the road – Thanks! We appreciate all the support, and we’ll see you next time in the kitchen!

We include affiliate links for products on our website. Making a purchase after clicking on our links and we may earn a commission which helps us produce more videos and drink more coffee :^) We participate in the Amazon Services LLC Associates Program, which is an affiliate advertising program. It provides a means for us to earn fees by linking to Amazon.com and affiliated sites, so we can make more videos.

Share and Enjoy !

The Best Garlic Shrimp Recipe You’ll Ever Eat

garlic shrimp recipe

Try this super-quick and delicious garlic shrimp recipe. Lots of olive oil and garlic add great flavor, especially when served with fresh sliced bread. Cook the shrimp quickly in a hot skillet, but don’t overcook, because over cooked shrimp get rubbery. The total cooking time for this dish start to finish should be about 5-7 minutes.

What you need for Garlic Shrimp

2 lbs SHRIMP
½ cup OLIVE OIL
½ cup GARLIC …or as much as you like (finely chopped)
½ tsp RED PEPPER FLAKES
½ tsp PAPRIKA
SALT and PEPPER to taste
3-5 Tbsp LEMON JUICE
some PARSLEY (chopped)
sliced BREAD for sure!

How to make this Garlic Shrimp Recipe

  • Peel and devein the shrimp (save the shells and heads to make a stock!)
  • Heat olive oil in a skillet on medium high heat. Check current prices for a non-stick skillet on Amazon.
  • When oil is hot, add red pepper flakes. Red pepper flakes add a nice heat, but substitute fresh peppers, or even a little cayenne if you like.
  • Add garlic and saute for 1 minute. Use as much garlic as you like. I prefer lots of garlic. I literally used an entire bulb. It seems like a lot, but the oil and garlic taste great with thick slices of fresh bread.
  • Add the shrimp, and continue sautéing on medium heat.
  • The shrimp only take about 3-5 minutes to cook depending on the size of your shrimp. Don’t overcook the shrimp; they will become rubbery if cooked overly long.
  • Add paprika, and salt and pepper to taste. If you’re just getting into home cooking, here are current prices for starter spice sets on Amazon.
  • Saute shrimp until JUST cooked, when shrimp begin to color and curl, then remove the skillet from the heat.
  • Add lemon juice and fresh chopped parsley.
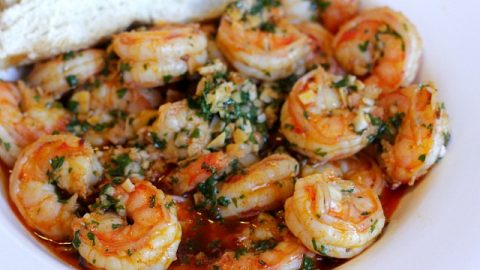
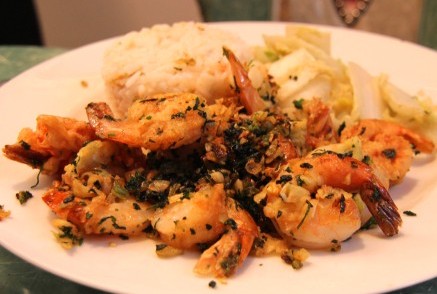
  • Mix well and serve in a bowl with thick slices of fresh bread. Or serve over rice…but this oily, garlicky shrimp is GREAT with thick slices of tasty bread.
garlic shrimp recipe
lots of garlic + lots of shrimp = delicious

Give this garlic shrimp recipe a try and let me know what you think…and bon appétit!

If you want another tasty shrimp idea, one of my favorites is this Spicy Tempura Shrimp Recipe.

spicy fried shrimp

Thanks For Watching Our Recipe Videos!

Thanks for checking out this cool carrot soup recipe, and all of our recipes. Sign up for our mailing list so you’ll never miss a new recipe. Also click a button below and share the dishes with your friends. You can also follow Chef Buck on Youtube. We appreciate all the kind comments and support, and we’ll see you next time in the kitchen!

If you like what CG and I do, support us on Patreon, or throw us a tip in our Paypal Tip Jar. We’ll happily enjoy a coffee on the road – Thanks! We appreciate all the support, and we’ll see you next time in the kitchen!

We include affiliate links for products on our website. Making a purchase after clicking on our links and we may earn a commission which helps us produce more videos and drink more coffee :^) We participate in the Amazon Services LLC Associates Program, which is an affiliate advertising program. It provides a means for us to earn fees by linking to Amazon.com and affiliated sites, so we can make more videos.
Share and Enjoy !

Mini Meatloaf Recipe – Packed with Flavor!

meatloaf recipe

Here’s a meatloaf recipe for folks who like their meatloaf to look like meatballs. These mini meatloaf meatballs are super flavorful and cook up quickly. I like to blend up some of the ingredients for this recipe, so a food processor is helpful for this dish, and you can check current prices for food processors at amazon.

Mini Meatloaf Recipe Ingredients

Meatloaf:

1½ lbs. lean ground BEEF
½ RED BELL PEPPER
1 sm ONION (or ½ lg)
4 cloves GARLIC
1 Tbsp CHILI POWDER
½ cup OATS
1 CARROT
1 EGG
2 tsp ITALIAN SEASONING
SALT and PEPPER to taste
1 Tbsp WOOSTERSHISTERSHIRE SAUCE

Meatloaf Sauce:

1/3 cup KETCHUP
1 Tbsp WOOSTERSHISTERSHIRE SAUCE
2 tsp MUSTARD
1 Tbsp CHILI POWDER
1 tsp CHILI PASTE or hot sauce to taste

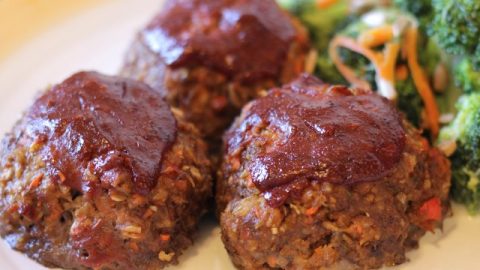
meatloaf recipe
Mini meatloaves make moist meatballs…mmmmm

How to make Yummy Mini Meatloaf Balls

  • Blend oats in food processor until finely chopped.
  • In the processor also finely chop the red pepper, onion, carrot, and garlic.
  • In a large bowl, combine processed oats and veggies.
  • Add seasonings, Worcestershire sauce and egg. Mix well.
  • Does it smell awesome? Add additional seasoning, if desired.
  • Add the ground beef and use your hands to combine. Do not overmix the ingredients, over mixing can make the meatloaf dense and heavy.
  • Lightly roll the meat mixture into 12 balls with your hands.  Dividing the mixture into 4 parts makes the distribution a little more even.
  • Place rolled loaves in a lightly greased baking pan. If you need an oven-safe pan, you can check here for current prices for baking sheets on Amazon. 
  • In a small bowl, combine all of the sauce ingredients. I use chili paste to add a little heat, but use hot sauce or whatever you like–or nothing at all if you don’t want the dish too spicy hot. Stir until smooth and spoon over top each dinky meatloaf.
  • Bake, uncovered, at 450 degrees F for 15-18 minutes. If desired, finish under the broiler to get a bit of brown/burnt on top.

And that’s it! Give this meatloaf recipe a go and let me know what you think. Bon appétit!

Of course, the key to many ground beef recipes is the seasoning. For another delicious recipe using ground beef, try The Best Nachos Supreme Recipe ever.

best nachos recipe
This is a fantastic Nachos Supreme dish, and a giant pizza pan makes a great dish for cooking and serving.

Thanks for Watching our Meatloaf Recipe Video!

Click a button below and share the dishes with your friends. You can also follow Chef Buck on Youtube. We appreciate all the kind comments and support, and we’ll see you next time in the kitchen!

If you like what CG and I do, support us on Patreon, or throw us a tip in our Paypal Tip Jar. We’ll happily enjoy a coffee on the road – Thanks! We appreciate all the support, and we’ll see you next time in the kitchen!

We include affiliate links for products on our website. Making a purchase after clicking on our links and we may earn a commission which helps us produce more videos and drink more coffee :^) We participate in the Amazon Services LLC Associates Program, which is an affiliate advertising program. It provides a means for us to earn fees by linking to Amazon.com and affiliated sites, so we can make more videos.

Share and Enjoy !

Nachos Recipe like Restaurant Nachos Supreme

best nachos recipe

Try this great Nachos Supreme Recipe. It’s a super grande-sized platter of nacho heaven.
We use ground beef for this nachos recipe, but if you skip the meat and just use beans–it’ll still be pretty damn tasty. The key to great nachos recipe is a great nacho filling, so spice up your bean and beef mixture just right and build your nacho castle on a tasty foundation.

What You Need to Make The Best Nachos Grande

1 lb. GROUND BEEF
1 ONION chopped
15oz can KIDNEY BEANS
16oz can LOW FAT REFRIED BEANS
CORN TORTILLA CHIPS (thick)
2 ROMA TOMATOES diced
½ cup JALAPENOS sliced and pickled
¼ cup BLACK OLIVES sliced
8-10oz CHEESE (shredded)
2-3 GREEN ONIONS chopped
¼ cup CILANTRO chopped
1 Tbsp BROWN SUGAR
1-2 Tbsp CUMIN
2-3 Tbsp CHILI POWDER
SALT and PEPPER to taste
serve with sour cream, salsa, guacamole

How to make this Nachos Recipe

  • In a large skillet on medium heat, add ground beef and begin browning meat.
  • Add chopped onion and continue browning.
  • Add some salt, cumin, chili powder, and black pepper to begin seasoning as the ground beef browns.
  • Once the meat is browned, drain the excess grease.
  • Add the kidney and refried beans and stir into the ground beef.
  • Add ¼ can water. Stir ingredients until well mixed.
  • Add brown sugar and more cumin and chili powder. Stir and simmer 5 minutes.
  • On a baking sheet spread out corn tortilla chips; thicker, sturdier chips work best. If you don’t have a larger baking sheet, then buy a giant pizza pan like this one on amazon or look at a local thrift store–that’s where we found our huge pizza pan.
  • Spoon and sprinkle the ground beef mixture over the chips.
  • Top nachos with diced tomato, sliced jalapenos, black olives, and the chopped bottoms of the green onions.
  • Sprinkle the top with cheese.
  • Slide the baking sheet into the oven (pre-heated at 400 degrees F) and let cook approx. 15 minutes
    or until the cheese is melted and the nachos heated through.
  • Remove from the oven and top with chopped green onion tops and cilantro.
  • Serve with sour cream, salsa, or guacamole and eat ’em while they’re hot.

World’s Best Nachos Recipe?

best nachos recipe
This is a fantastic Nachos Supreme dish, and a giant pizza pan makes a great dish for cooking and serving.

For another meaty meal, check out these Crispy Oven-baked Chicken Wings.

wings recipe
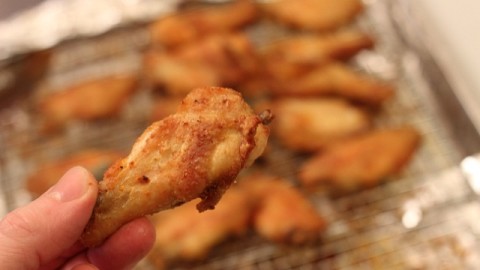
Oven baked wings are healthier than deep fried, and less messy to make!

Thanks for Watching our Nachos Recipe Video!

Click a button below and share the dishes with your friends. You can also follow Chef Buck on Youtube. We appreciate all the kind comments and support, and we’ll see you next time in the kitchen!

If you like what CG and I do, support us on Patreon, or throw us a tip in our Paypal Tip Jar. We’ll happily enjoy a coffee on the road – Thanks! We appreciate all the support, and we’ll see you next time in the kitchen!

We include affiliate links for products on our website. Making a purchase after clicking on our links and we may earn a commission which helps us produce more videos and drink more coffee :^) We participate in the Amazon Services LLC Associates Program, which is an affiliate advertising program. It provides a means for us to earn fees by linking to Amazon.com and affiliated sites, so we can make more videos.
Share and Enjoy !

Brussels Sprouts Recipe That Everyone Will Love

brussels sprouts

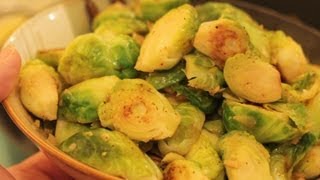
This is my absolute favorite Brussels Sprouts recipe. it’s super tasty, simple to make, and a healthy choice, too, so definitely give it a try.

Brussels Sprouts Recipe Ingredients

1½ lbs BRUSSELS SPROUTS
3-4 Tbsp OLIVE OIL
½ ONION (chopped)
4-5 cloves GARLIC (finely chopped)
1 LEMON zest and juice …current prices online for Kitchen Zesters
½ cup WATER
SALT and PEPPER, to taste

brussels sprouts recipe
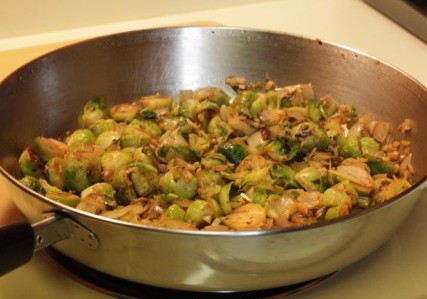
Sear Brussels sprouts in a hot skillet for exceptional taste!

How to Cook Brussels Sprouts

  • Wash 1½ lbs sprouts. Cut off the ends and discard outer leaves. Slice sprouts into halves, or larger sprouts into 3rds.
  • Heat 3-4 Tbsp oil in a skillet on high heat–you want the skillet to be hot to sear the sprouts–and don’t be shy with the olive oil.
  • Add Brussels sprouts. They should start to sizzle and pop right away. Let set before stirring to get a seared edge. Turn sprouts and continue to sear.
  • After 4-5 minutes, stir in onion and garlic and continue to cook on high to med. high heat, searing and turning another 3-4 minutes.
  • Then reduce heat to medium and add water. Add seasoning.
  • Stir, cover, and let cook 4-5 minutes.
  • Then turn off heat, stir in lemon zest and lemon juice, and serve.

Need a nice skillet? Check current prices for skillets on Amazon.

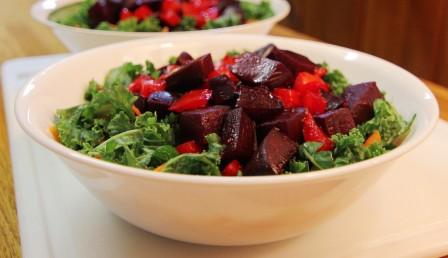
Give this Brussels Sprouts Recipe a try and let me know what you think, and if you’re still in the mood for foods that start with “B”, try this Beet Recipe.
brussel sprouts recipe

Brussels Sprouts Fun Facts

  • 89% of all children despise Brussels Sprouts.
  • 3/4 of all convicted felons do not eat Brussels sprouts.
  • Albert Einstein considered the Brussels Sprout to be the most compact cabbage, relatively speaking.
  • Even children who dislike the taste of Brussels sprouts appreciate the vegetable for it’s “slingshotability”
  • Every U.S. president has loved Brussels sprouts and eaten them routinely.

Thanks for checking out our Brussels sprouts recipe, and all of our recipes. Be sure and sign up for our mailing list and never miss a new Chef Buck cooking video, and also click a button below and share the dishes with your friends. We appreciate the kind comments and support, and we’ll see you next time in the kitchen!
–Chef Buck

Thanks for watching our recipe videos!

We include affiliate links for products on our website, so if you make a purchase after clicking on our links, we may earn a commission which helps us produce more videos and drink more coffee :^) We participate in the Amazon Services LLC Associates Program, which is an affiliate advertising program providing a means for us to earn fees by linking to Amazon.com and affiliated sites, so we can make more videos.
Share and Enjoy !

Follow Me!